 FwFHI
Family Home Inventory by FAMware (Free)
FwFHI
Family Home Inventory by FAMware (Free)

Product Info Page for FwFHI
To Downloads Page

FAMILY HOME INVENTORY is a tool for capturing your personal property, room by room, attaching photographs when desireable, and keeping track of disposition of property when that time comes. Another important use is to document your property, everything in your home, for insurance purposes in case of fire, flooding, or other disaster. The focus is on removeable property like furniture, not on home improvements, permanent attachments, nor fixtures. If you would take it with you when you move keep track of it here.
Features:
- Choose the floor or space.
- Add rooms.
- Add inventory items to rooms.
- Attach photos.
- Keep track of inventory in multiple homes and locations (such as second homes or rental units), including out buildings, your yard, storage facilities, etc.
- Exports to Excel or PDF file.
- Easy and FUN to use. Visually intuitive.
Note: This product (FwFHI) is also included in Family Finances (FwFF) and Family Software Bundle (FwFSB).
See Tracking Property
< - - Click for quick illustration of home inventory concept.
To Downloads Page
FwFHI EXAMPLE:
Fancy View
Plain View

To Downloads Page
Excerpts from FwFHI Help System:
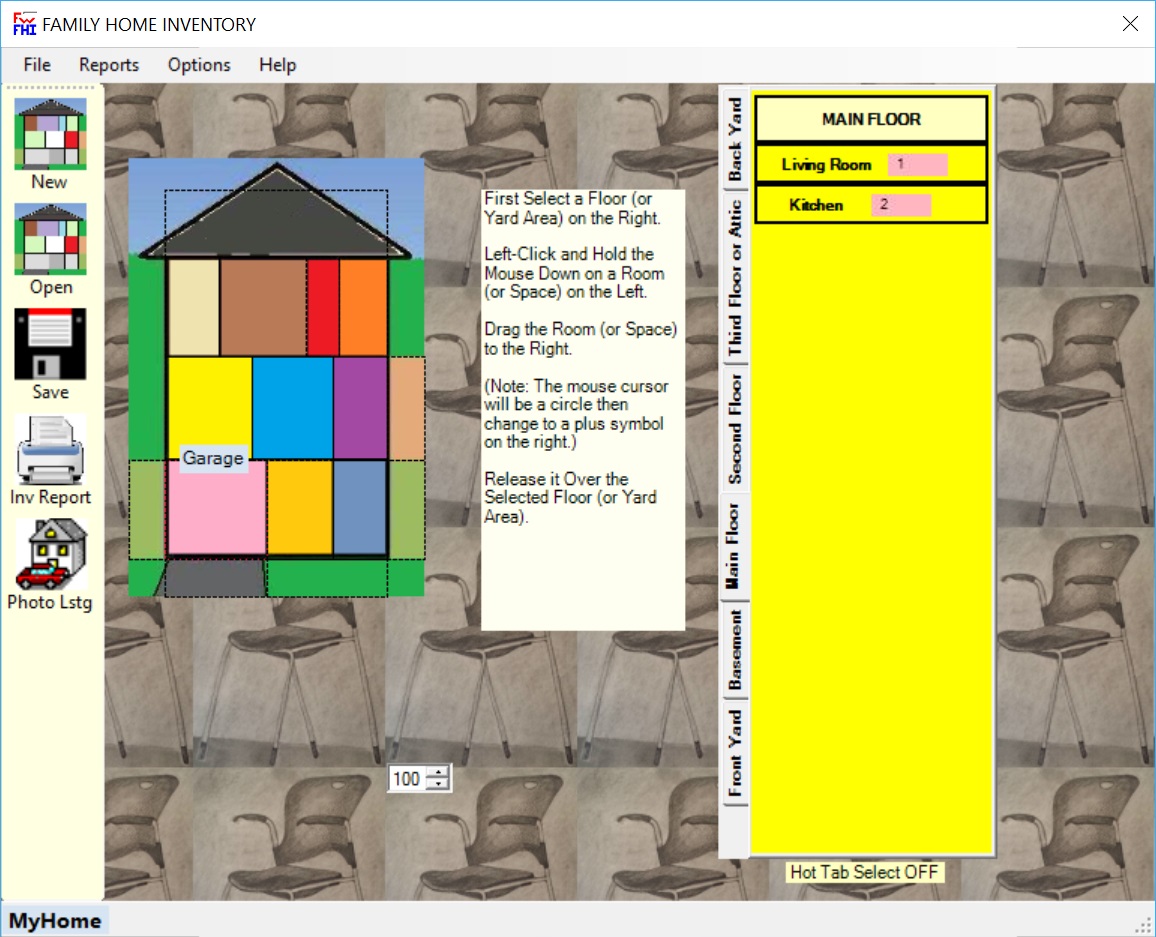
Use the main window to:
Assign rooms (or spaces) to a floor (or yard area).Select rooms to update.
Launch reports.
Select options.
To get started please follow the brief tutorial below:
Create a Test Home:
Click the [New] toolbar button on the far left.Type the name TestHome (this becomes the folder name).
Click OK and confirm by clicking Yes.
How to Add Rooms to Floors (or Yard Areas)
You should be in TestHome (this is displayed at the bottom of the screen in the status bar)Click the "Main Floor" tab in the panel on the right: The Main Floor pane should appear in yellow.
Click "Options" from the Main Menu at the top of the screen.
Check "Add Default Item on Room Add".
Click Options again to confirm that it is checked. (Note: Having this option checked is NOT the normal default setting but is used during this brief tutorial.) Move your mouse around the Home on the left of the screen (room types will be displayed as you pass over them with the mouse).
Click "Living Room or Family Room". While holding down the mouse drag it to the Main Floor tab on the right and release the mouse.
Right click on the newly added button and select "Rename". Rename the room to Living Room and click OK.
Click the [Living Room] button. The Space Inventory Entry Window should appear with "Living Room" in the title. You should see a "Sofa" that was added automatically (this is a because "Add Default Item on Room Add" was checked).
Click the cancel ("X") button in the upper right corner of the Space Inventory Entry Window. You should be back on the main window showing Main Floor.
Click "Garage" on the left and drag it to the Main Floor on the right.
Click the [Garage] button. The Space Inventory Entry Window should appear with "Garage" in the title.
You should see a "Table Saw" that was added automatically (this is because the "Add Default Item on Room Add" option was checked).
Click the cancel ("X") button in the upper right corner of the Space Inventory Entry Window.
You should be back at the main window showing Main Floor.
Input/Output:
Space Inventory Entry Window:

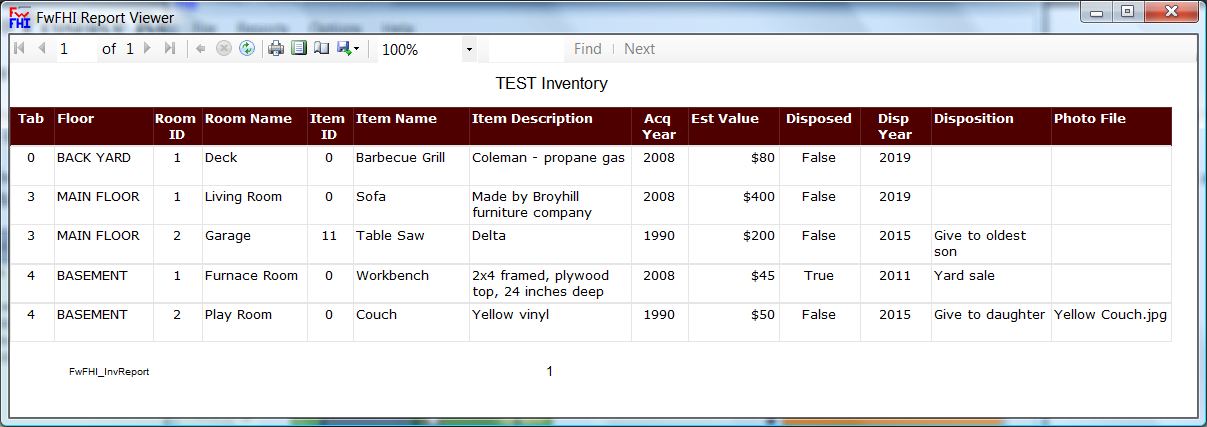
Inventory Report:
Adding Photos:
Click Here

Click the pink Select button then Navigate to Photo File
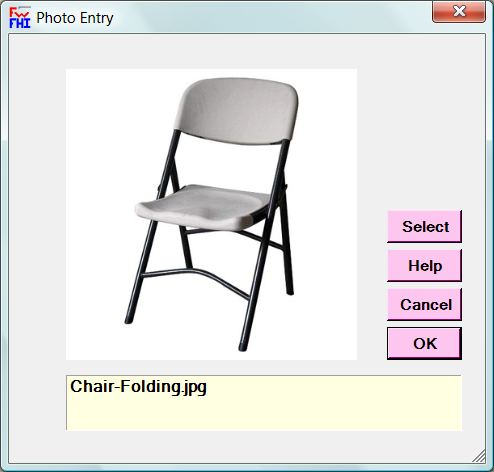

Selected Photo File Name Appears

Photos Report

To Downloads Page
| Share this site on: |
|
|
|
|
|